Spring Fair of Homemade Wines at Soreq Winery

This post is from last year. This year’s festival will be on Friday, 29 April from 1000 – 1600. Don’ t miss it.

Soreq Winery, one of the first boutique wineries in Israel, is situated between the Ayalon and Soreq valleys, in a region where wine was produced as early as 3,000 years ago. The Shacham family founded the Soreq winery in 1994. Nir Shaham is the vintner and his parents, Heli and Yossi, are the proprietors. They now produce 10,000 bottles a year from a 30-year-old vineyard as well as a younger vineyard planted on the nearby slopes of the Judean Hills. The winery produces wine from Merlot, Grenache, Petit Verdoux, and Cabernet Sauvignon grapes.

Shortly after opening their winery, Nir Shaham, gave courses on winemaking which developed into the Soreq School of Winemaking. This school is attended by amateurs and professionals who are interested in winemaking at home or for those whose dream is to open a boutique winery, which is becoming more and more fashionable in Israel. For the past several years, Soreq winery has organized a homemade wine fair in the spring that showcases their current and past students. Some of their well-known offspring are Avidan, Mond, Nachshon, and Kadesh Barnea wineries.

This year’s fair featured about 40 winemakers, most of whom made only red wines, such as Merlot, Cabernet Sauvignon, and Shiraz, but there were a few brave souls that make white wines, dessert wines, and even one winemaker who made a decent rosé. One thing most of the home wineries have in common is that their products are not “technically” kosher, a process that costs more money than most of them can justify when the output is still small. Nevertheless, some of them produce wine that in practical terms is kosher, since they are religiously observant or traditional themselves and follow the rules of kashrut.

The enthusiasm of the winemakers was infectious and it made you want to try their wines that they have worked so hard on. Gytot Winery is a good example: Malkiel and Dina Hadari have been making wine for the past three years after Dina gave the Soreq Winery course as birthday present to her wine-loving husband. She told him, “You love drinking wine and talk about it all of the time, why don’t you try making it yourself.” They now have six oak barrels and all of the equipment they need to produce several thousand bottles of Merlot and Cabernet Sauvignon.

This was my first time at the fair and I must say that I was quite impressed with the wines on offer, most of which I would buy and happily serve to guests at dinner. Actually, the real difficulty was deciding which were the best so that I could buy some without breaking the bank, even though the average price was about 70NIS (20USD) a bottle.

And if you are worried about drinking too much on an empty stomach, there were also beautiful vegetarian tapas for sale from Maya Ben Tzvi, a caterer who specializes in healthy vegetarian gourmet dishes.

Some of the tapas were grilled portobello mushrooms with a dollop of tomato confit, topped with a miniature potato pancake, stuffed zucchini and eggplant, and bruschetta with various toppings, such as poached pears and Roquefort cheese. They were delicious.

And to close your meal, you could try a delicious and not too sweet Delicate Passionfruit liqueur from the Fishbein family farm at Ein Irron in the north of the country.

Next year, I hope there will be an even bigger selection of wines, especially including whites and rosés; but I better have a hearty breakfast first.

Soreq Winery Homemade Wine Fair
Entrance fee: 55NIS
Moshav Tal Shachar
08-9450844
Israeli Breakfast at Home

Israeli Breakfast
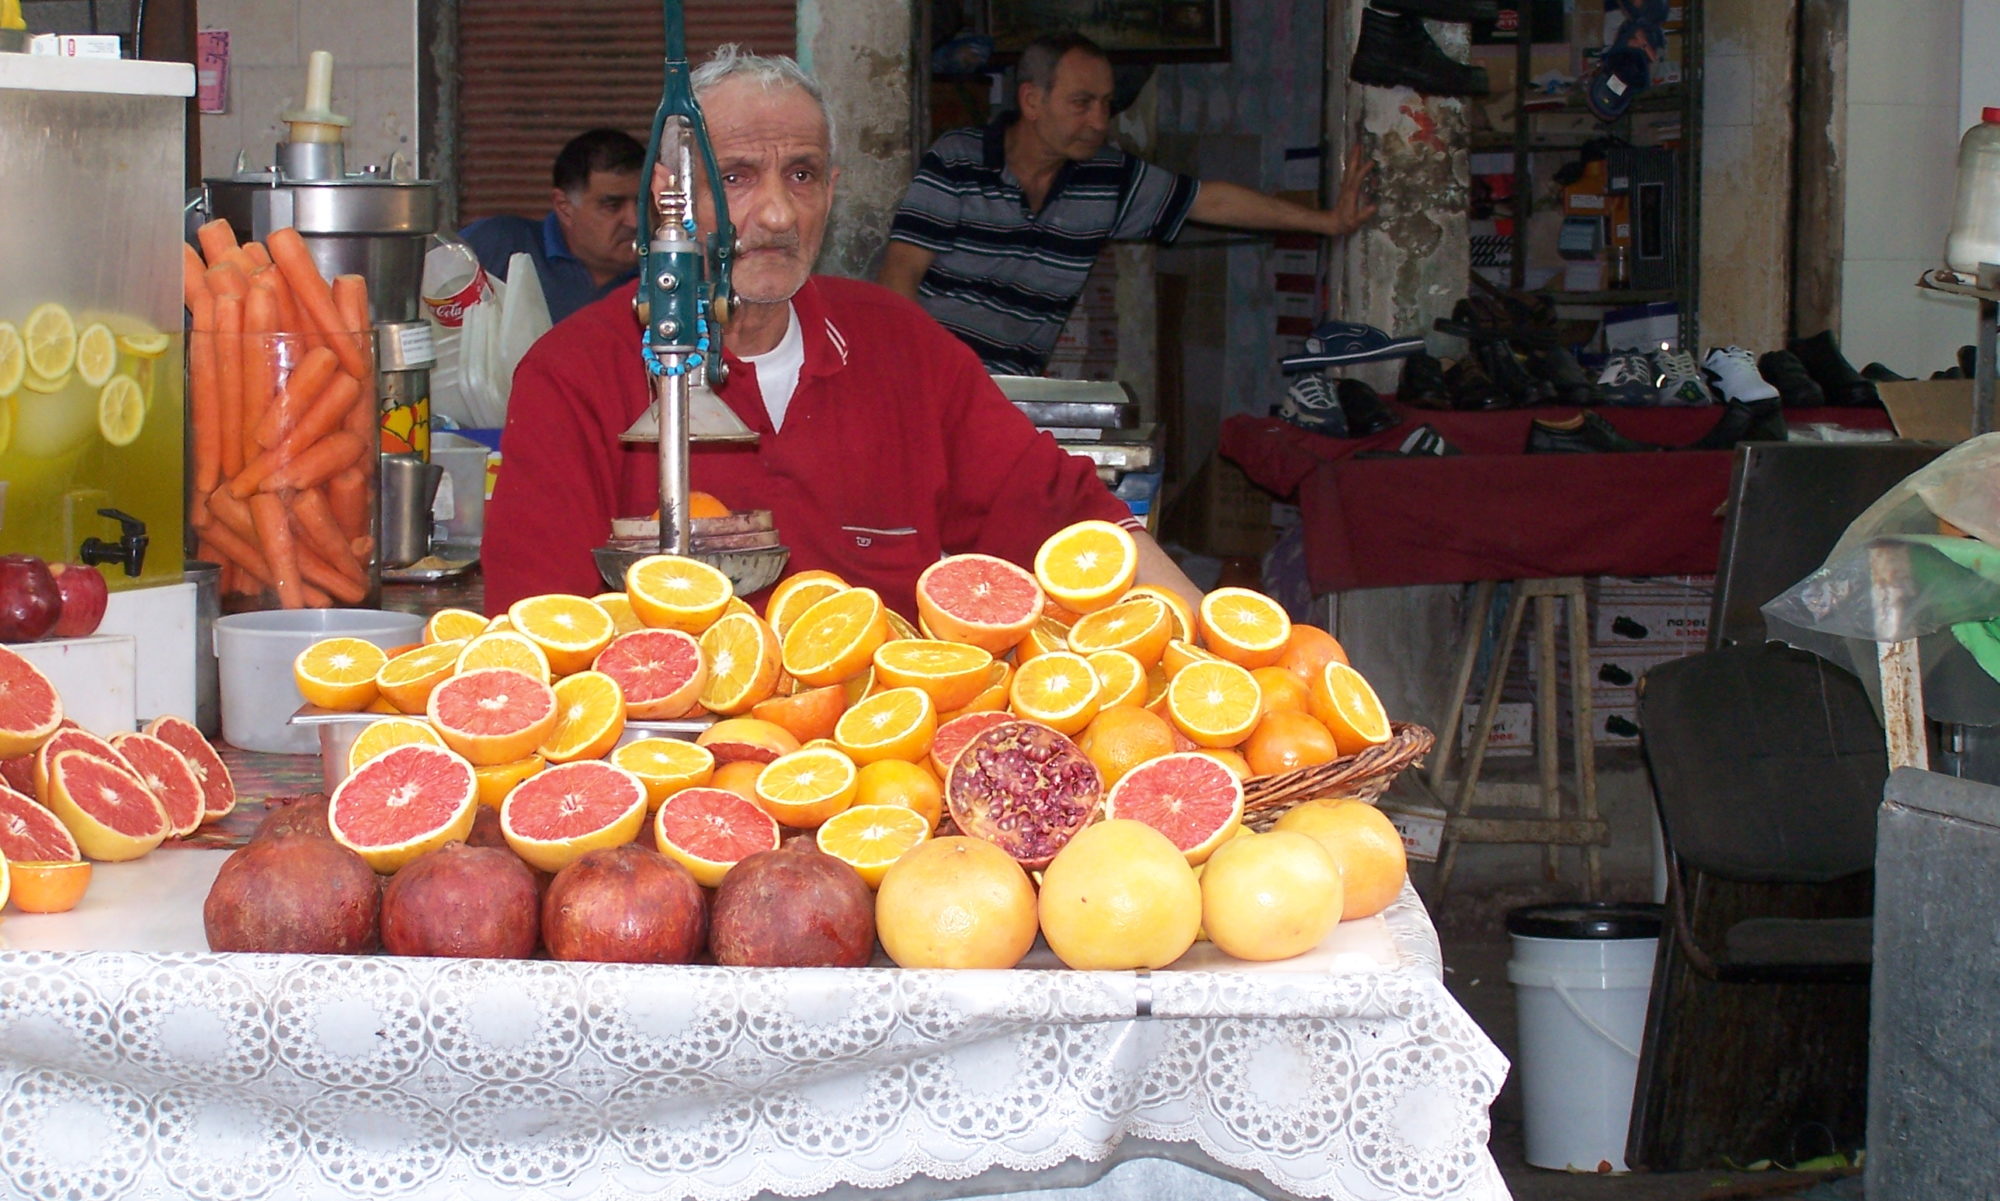
Whole Wheat rolls, Yemenite Flatbread, Olives from the Judean Hills, Pickled Baby Eggplants, Assorted Cheeses, Arab Salad, Freshly Squeezed Orange Juice, Coffee


The tradition of an Israeli breakfast, which is similar to the Arab breakfast, began in the early days of the 20th century on the kibbutz. Kibbutzniks would go out to the fields at the crack of dawn to work before the heat of the day, and they’d return home at 9AM to eat a giant breakfast consisting of fluffy omelettes, fresh salads made with cucumbers and sweet tomatoes, hummus, eggplant salad, pita and other breads, and homemade jams. This hearty breakfast spilled over into hotels starting in the 1930s, and now you can have an Israeli breakfast at most cafes and restaurants.

This Israeli tradition has become a weekend ritual in my home, sometimes an elaborate affair for guests, but always made with local ingredients from trips to dairy farms or the shuk. The Israeli breakfast is ideally a leisurely breakfast eaten with family and friends talking about current events, recent travels, or just catching up. In our house, we play early or classical music in the background, talk a little, read the newspaper, and read that book that we have been trying to finish for weeks.

I always make either a fresh herb omelette or frittata, with a selection of cheeses such as labne, Bulgarian feta, and cottage cheese, bread, olives, and jams. This weekend I made a Persian frittata called Kuku (pronounced KooKoo), which is a herb frittata that varies from region to region: some kukus are made with a Persian spice mixture called adviehis, which is a blend of cumin, cinnamon, cardamom, and dried rose petals. It is typically served in the Spring during the Persian New Year, Nowruz.

The kuku I made only called for allspice and saffron, but it was just enough spice to go with the herbs and vegetables in this recipe. This frittata is simply delicious and will definitely be served again on our table.

What special dishes do you make for breakfast?

Kuku

Kuku
(Persian Omelette with Saffron) Recipe from Moro East by Sam & Sam Clark
Ingredients
  • 1 large aubergine cut into 1.5cm (1/2 inch) cubes
  • 50 g 3-1/2 tablespoons butter
  • 3 tablespoons olive oil
  • 6 allspice berries crushed (or a pinch of ground allspice)
  • 6 green onions thinly sliced
  • 6 large eggs
  • 2 rounded tablespoons barberries or currants
  • 2 tablespoons pine nuts or walnuts
  • A good pinch of saffron about 40 strands, soaked in 1 tablespoon boiling water
  • 250 g 1/2lb fresh spinach, wilted in a hot frying pan with a little olive oil and a pinch of salt, then drained and roughly chopped
  • 2 tablespoons finely chopped fresh parsley
  • 1 tablespoon finely chopped fresh mint
Instructions
  1. Preheat a 25 cm (9 inch) round baking dish or ovenproof frying pan in the oven at 220C (425F).
  2. Sprinkle the aubergine with a good pinch of salt and let stand for about 5 minutes. Pat the moisture off of the aubergine and set aside.
  3. Heat the butter and 2 tablespoons of olive oil in a frying pan over medium heat and add the green onion and allspice. Saute for about a couple of minutes and then add the aubergine, stirring often until tender and making sure the onion does not burn. Remove from the heat and set aside.
  4. Whisk the eggs in a medium-sized bowl and add the barberries, pine nuts, saffron (including the liquid), spinach, parsley, mint, and salt and pepper. Add the aubergine mixture. Remove the baking dish from the oven and pour in the egg mixture. Place in the oven and bake for 12-15 minutes until the egg has set and the top is slightly brown and puffy. Let the kuku rest for 5 minutes before serving.

An Afternoon with Joan Nathan

Ezra Kedem_Israel Aharoni_Joan Nathan_Mark Furstenberg

A couple of weeks ago, I attended a discussion at the annual Jerusalem International Book Fair entitled, The Changing Jewish Kitchen – Is Jewish food still Jewish food and what is it?. The panel consisted of cookbook author Joan Nathan, Israeli chef, TV personality and food writer Israel Aharoni, Israeli chef Ezra Kedem (Arcadia Restaurant in Jerusalem), and the moderator, baker, chef and restaurant consultant Mark Furstenberg.

I have been a fan of Joan Nathan’s since my mother gave me one of her cookbooks, Jewish Holiday Kitchen, almost 25 years ago. The first two recipes I made from that cookbook were for Passover: Seven-Fruit Haroset From Surinam and Larry Bain’s Bubie’s Haroset. They were a big hit at my family Passover dinner. Years later, when I moved to Israel and Mr. BT and I were hosting our first seder, I told him about a Venetian haroset recipe containing chestnuts that I had found in Joan Nathan’s cookbook and which I wanted to make. He said, let’s make it, and this was the basis for the now famous Nordell family haroset.

During the panel discussion, Ms. Nathan talked about when she visited Strasbourg, France to do research for her latest cookbook, Quiches, Kugels, and Couscous: My Search for Jewish Cooking in France: the people she interviewed there, she recounted, begged her to find some lost Alsatian Jewish recipes. She said that she is afraid that some of the traditional Ashkenazi recipes are being lost because people are shying away from making the more fattening recipes, like those containing chicken fat, duck fat and goose fat.

Israel Aharoni told an interesting story about Jewish fusion cooking he witnessed in someone’s home in Jerusalem. During the taping of his famous television program, Derech Ha’ochel (The Way of Food), with his friend and co-host, comedian Gavri Banai, they were invited to have Shabbat dinner with a family in the Orthodox neighborhood of Mea Shearim. The woman of the house started preparing gefilte fish, which she served with hilbeh, a traditional Yemenite condiment made with fenugreek, zhug, and coriander,  and tehina (sesame paste). Aharoni, whose parents were from Uzbekistan,  was quite shocked that a traditional Ashkenazi family would put Yemenite and Middle Eastern condiments on their table. But then he realized that this was a common occurrence for families who lived in the melting pot of Israel where you find Yemenites and Moroccans who eat gefilte fish and Ashkenazis who eat North African shakshouka and tagine.

The discussion moved on to topic of olive oil. Most people would assume that a country where you can find ancient olive oil presses would have a long and uninterrupted history of cooking with olive oil. But as Aharoni said, “Until 20 or 25 years ago, you couldn’t even get olive oil in Israel. You had to have a friend, who had a friend, who knew someone who lived in an Arab village.” However, he said when Italian food became popular here, the local supermarkets started stocking lower quality Italian and Spanish olive oil. Things have progressed, and you can now buy high quality local olive oil.

Ezra Kedem, who is half Kurdish and half German,  said that when he was a child in Jerusalem and came home hungry from school, he would be given dark bread with olive oil and za’atar. His eyes lit up when he talked about this childhood treat. He said that his parents bought their olive oil once a year from Arabs in Beit Jala, a town south of Jerusalem. The olive oil was put in two or three jerrycans that they would bring to the Arab family to fill up with the liquid gold, as Kedem described it.

After the discussion was over, I asked Ms. Nathan if she was going to be doing a book signing, to which she replied, “they didn’t arrange one, but come with me and I will be happy to sign a book for you.” She is very down-to-earth and easy to talk to. I really felt like I could have talked to her for hours, but she had a appointment to be interviewed by fellow Israeli blogger and Haaretz editor, Liz Steinberg, who wrote a lovely article about her in that newspaper.

What I love most about her cookbooks is the stories and history that she gathers for each recipe. She takes you on a wonderful trip to a country, a town, a home or a restaurant without leaving your home. She makes sure that you feel the love that goes into each family dish. I so wanted to talk to her about some of my own family treasures: the matza balls, the noodle and matza schalets, and the butter cookies. Alas, it will have to wait for another trip.

The first recipe that caught my eye in her new cookbook was a recipe called Soupe au Blé Verte, which is a spicy vegetarian version of the classic Tunisian soup called Shurbat Farik bi’l-Mukh, made with chickpeas and freekeh, and it is a perfect soup for a cold winter’s night. I made a few slight additions to the recipe: I added garlic, since as most of you know, having a half-Hungarian in the house means that you can’t make something without garlic unless you can prove that it is an absolutely forbidden ingredient in that particular dish.

Cavalo Nero

And, I also added our homegrown Cavalo Nero (Tuscan Kale) at the very end of the cooking process. It gave a nice crunchy texture to the soup.

Quiches, Kugels, and Couscous is a real treasure and I will be cooking more dishes from it in the coming weeks.

Soup au Ble Vert

Tunisian Vegetable Soup with Chickpeas and Freekeh
(Soupe au Blé Verte) Slightly adapted from Quiches, Kugels, and Couscous: My Search for Jewish Cooking in France by Joan Nathan
Ingredients
  • 1 cup dried small chickpeas
  • 1/4 cup olive oil 1 small onion diced
  • 1 stalk celery finely chopped 1 carrot, peeled and diced
  • 3 cloves garlic minced
  • 1/4 cup plus 2 tablespoons finely chopped fresh parsley
  • 1 bay leaf 1 teaspoon harissa plus more for garnish
  • 1/2 teaspoon cayenne pepper
  • 1 teaspoon salt or to taste
  • 1/2 teaspoon freshly ground black pepper
  • 7-8 cups water
  • 1 tablespoon tomato paste 1 cup freekeh picked over for stones and chaff and rinsed
  • 1 cup cavalo nero chopped with the center rib removed
  • 1 lemon quartered
Instructions
  1. Place the chickpeas in a bowl, cover with water, and soak them overnight.
  2. The next day, put the olive oil in a soup pot and saute the onion, celery, carrot, and garlic until the onion is transparent. Add the drained chickpeas to the pan with 1/4 cup of parsley, the bay leaf, harissa, cayenne pepper, salt, and black pepper. Stir in the tomato paste and a cup of water, and cook for about 5 minutes.
  3. Add 6 cups of water and bring to the boil. Stir in the freekeh and lower the heat. Cover the soup, and simmer for 1-1/2 hours. You may have to add an additional cup of water. Add the cavalo nero and cook for an additional 30 minutes. Discard the bay leaf and serve with a sprinkling of parsley and a wedge of lemon.

Chocolate Workshop at Sarina Chocolates

Sarina_Sign

Mr BT was away for Valentine’s Day, so as a consolation, he sent me to a chocolate workshop at Sarina Chocolates in Ein Vered, one of my favorite villages, which is mere a hop, skip, and a jump from my house. I was already familiar with Sarina’s chocolates because they sold their chocolates for Pesach at my office. Sarina’s chocolates are divine and come in all sorts of interesting flavours, such as anise and honey, passion fruit, rosemary, and chili-orange to name a few.

The Association for Americans and Canadians in Israel (AACI) in Netanya organised this event, and apart from the pleasure of the event itself, I must say I had a lot of fun meeting new people originally from South Africa, England, USA, and Norway.

Limor Druker

The chocolatier behind Sarina Chocolates is Limor Drucker, whose parents were Syrian, is originally from Zaire, now know as the Democratic Republic of the Congo, but has lived in Israel since she was 18 years old. When she and her husband moved to Germany for several years due to a temporary relocation for her husband’s business, she taught English, but because of her love of cooking, she started giving cooking workshops to expats. She had a lot of requests to offer a chocolate-related course, which eventually led her to only focusing only on chocolate. She enjoyed it so much that she had an idea to start offering chocolate-making courses when she returned to Israel; so while living in Germany she decided to take professional chocolate-making courses in Belgium at Barry-Callebaut and at Valharona in France. She also apprenticed for two chocolatiers in the USA.

Chocolate Workshop

Limor began the course by explaining where chocolate comes from and showing a short film explaining the process from bean to bar. She then asked us if cocoa could be grown in Israel and we all said no because we don’t have a tropical climate, let alone enough rainfall here, like they do in places like South America, Africa, South East Asia, and the South Pacific where most of the world’s cocoa comes from. She said she had a surprise for us and asked us to join her outside.

Young Cacao Tree

Lo and behold in the small acclimatised greenhouse were six young Theobroma (which means ‘Food of the Gods’) cacao trees that here husband found at a local nursery. When the agricultural ministry found out she had cacao trees, they decided to give her a grant to build the greenhouse to be used for educational purposes for children and for her chocolate courses. She said that she doesn’t expect the trees to give off any fruit, but if they do, it would be an added bonus. However, six plants will never produce enough fruit to make enough chocolate to warrant buying the equipment to dry, roast and process the beans into cocoa.

New Leaves

What I found interesting about these trees is that the bronze coloured leaves are not dying leaves, but they are new leaves on the tree that eventually turn green. These trees grow to 4–8 m or 15–26 ft tall, so they will have to be trimmed in order to keep them in the greenhouse, but this should only make them stronger. The flowers of the tree grown from the tree trunk and older branches, not the leaf stems. They are pollinated by tiny flies, not bees. I guess that is why we have never seen cocoa honey; too bad.

Tempering Machine

Before making chocolate, we did a tasting of dark, milk, and white chocolate, which as most of us know is not chocolate at all, but is made only from cocoa butter. She also explained how to temper chocolate, which is a process by which you melt the chocolate to around 46C (115F), cool it to below 28C (84F), and then bring it back up to 31C (89F).

Making Chocolate Casings

Chocolate that has been tempered is smooth, with a shiny finish and snaps when you break off a piece. Limor offers a chocolate tempering course that I would like to take some time.

Scraping Off Excess Chocolate

Chocolate Shells

Limor then showed us how to make chocolates by filling a mould with chocolate, scraping off the excess, letting it sit for a couple of minutes, and then pouring out the excess chocolate until only the outside shell is left; she then filled the shells with a chocolate and limoncello mixture.

Getting Ready to Make Truffles

We then put on hats and aprons and started making truffles. She showed us how to make ganache with dark chocolate and cream, and then brought out trays that she had pre-prepared.

Making Truffles

She gave us bowls of toasted coconut, ground nuts, icing sugar and coffee mixture, and beautiful dark cocoa to roll our truffles in.

My Truffles

I probably would have brought home more chocolates if Mr BT was with me, but I didn’t want to overdo it.

Maybe I Should Have Made More

Here is a plate of goodies that someone brought home to the entire family.

I really had a lot of fun making chocolates and meeting new interesting people. Can’t wait to do it again sometime.

Tamarind Date Cake for Tu Bishvat

Tamarind Date Cake

Tu Bishvat is a minor Jewish holiday in the Hebrew month of Shevat, usually sometime in late January or early February, that marks the New Year of the Trees (Hebrew: ראש השנה לאילנות, Rosh HaShanah La’Ilanot‎) or the season in which the earliest-blooming trees in the Land of Israel emerge from their winter sleep and begin a new fruit-bearing cycle. It is customary to plant trees and eat dried fruits and nuts, especially figs, dates, raisins, carob, and almonds.

Even though it is considered a minor festival, the commandment to plant trees in the Land of Israel is so important in Jewish tradition that there is even an ancient Rabbinical saying that if you see the Messiah arrive while you are on your way to plant a tree, you have to finish planting it before greeting him.

This Tu Bishvat I am recovering from the flu, but I decided that it was important to still make something this year in memory of all of those who lost their lives in the tragic Carmel fire last month. I wish their families no more sorrow and pray for a new, healthy forest to grow in place of the old one.

Dates and Tamarind

I made a Baronessed version of my baking hero,  Dan Lepard‘s Tamarind Date Cake. The original recipe calls for dates, which I assume most people would use Madjools, but I decided to take advantage of the different varieties of dates we have on offer here and used Madjool (center in picture above), Dekel Noor (right), and Halawi (left) dates. I wasn’t sure what Dan meant by tamarind paste in the recipe, but I used mashed whole tamarind (top of picture above) instead of the smooth paste you can buy in a jar. The mashed tamarind is more readily available in health food stores here.

This cake is delicious, moist and not too sweet because the tamarind adds a nice sour note to the cake. This is the second best date cake I have ever had. The best is my father’s fresh apple cake that has an equal amount of dates in the recipe.

Tamarind Date Cake Slice

Tamarind Date Cake
adapted recipe from Dan Lepard.
Course: Dessert
Cuisine: Mediterranean
Servings: 8
Ingredients
  • 200 g 7 ounces chopped dates (Madjool or a combination of several varieties)
  • 50 g 1.7 ounces or 1/4 cup tamarind paste
  • 300 ml 1-1/4 cup water
  • 250 g 1/2lb or 2 sticks unsalted butter
  • 150 g 5 ounces or 1/2 cup dark brown sugar
  • 2 large eggs
  • 275 g 9.7 ounces or 2-3/4 cups plain flour
  • 2 teaspoons bicarbonate of soda baking soda
  • 1/2 teaspoon ground cardamom
  • 1 teaspoon cinnamon
  • 1/4 teaspoon ground clove
  • Zest of 1 large orange
  • 175 g 6 ounces or 1-1/2 cups walnuts, roughly chopped
Instructions
  1. Line the base and sides of a deep, 18cm (7 inch) cake tin with nonstick baking paper, and heat the oven to 180C/350F (160C/325F convection). Put the dates, tamarind paste and water in a pan and bring to a boil. Boil for a minute, remove from the heat, add the butter, and set aside for 10 minutes to cool.
  2. Place the date mixture in a large mixing bowl and add the brown sugar, stir, then beat in the eggs until smooth. Ina separate bowl, mix the flour, baking soda, spices and orange zest together and add to the date mixture until combined. Then, stir in the walnuts.
  3. Spoon the mixture into the cake tin and bake for about an hour, or until a skewer poked into the centre comes out clean. Cool for 10 minutes, remove from the pan, and completely cool on a cake rack.

Ringing in 2011 with a Gourmet Dinner

New Year's Eve 2011 Dinner

New Year’s Eve, Mr BT and I celebrated our anniversary and 2011 with a gourmet romantic dinner. Our anniversary was actually the day before, but I had more time to prepare a lovely meal on Friday, so we had an anniversary/Shabbat/2011 special meal.

Last week, I found two beautiful goose breast fillets and some very large bright yellow quinces. I thought these would be two perfect ingredients for a romantic anniversary dinner. I made goose breast with a quince and red currant sauce, roasted butternut squash, Jerusalem artichokes and potato, and steamed broccoli. For dessert, I made a luscious quince tarte tatin.

This year, Mr BT and I will be searching for a home to call our own. Something we have dreamed about for a long time. I hope that 2011 is filled with more foodie adventures that I can share with you. And, I hope that all of your hopes and dreams come true this year.

Mr BT and I wish you all a very happy, healthy, peaceful and delicious 2011.

Goose Breast with Quince and Red Currant Sauce

Caramelised Goose Breast with Quince and Red Currant Sauce
Course: Main Course
Cuisine: International
Servings: 2
Ingredients
For the goose:
  • 2 goose breast fillets about 200g (7oz) each
  • 1 tablespoon honey
  • 1 teaspoon Dijon mustard
  • 1 piece of fresh ginger about 2 1/2 cm (1 inch), minced
For the sauce:
  • 1 medium poached quince diced
  • 1 shallot minced
  • 4 tablespoons port
  • 1 piece of fresh ginger about 2 1/2 cm (1 inch), minced
  • 100 ml 1/2 cup dry white wine
  • 1 strand of fresh red currants or 1/4 cup of thawed and drained fresh-frozen
  • 1 tablespoon fresh chives chopped
Instructions
  1. Preheat the oven to 220C (425F).

  2. Season the goose breast with salt and pepper. Heat a dry pan over medium-high heat. Sear the goose, skin-side down, until golden. Turn the breast over and cook for another couple of minutes. Add the honey, mustard and ginger to the pan, and baste the goose a few times. Transfer the goose to a roasting pan with a rack and roast in the oven for 5 minutes. Do not overcook. The goose should be slightly pink in the center.
  3. Meanwhile, add the quince and shallot to the pan in which you seared the goose, keeping the goose fat in the pan to help thicken the sauce. Add the port to de-glaze the pan, bring to the boil and simmer until reduced by half. Add the ginger and the white wine, return to the boil and simmer to reduce again. Season with salt and pepper, and add the red currants and chives.
  4. To serve, place the roasted vegetables on the center of the plate, slice the goose breast and place on top and pour the sauce on top of the goose.


Roasted Butternut Squash
Course: Side Dish
Cuisine: Mediterranean
Servings: 4
Ingredients
  • 180 g (1 cup) butternut squash peeled and cut into cubes
  • 180 g (1 cup)Jerusalem artichokes peeled and cut into cubes
  • 180 g (1 cup) roasting potatoes cubed
  • 2 tablespoons fresh thyme chopped
  • 3 tablespoons olive oil
  • Salt and pepper
Instructions
  1. Preheat the oven to 180C (350F). Place the butternut squash, Jerusalem artichoke and potato on a baking tray in one layer. Sprinkle the fresh thyme and massage in the olive oil until the vegetables are coated evenly with the thyme and the oil. Sprinkle the vegetables with salt and pepper and roast them for 15-25 minutes until the vegetables are tender.

Quince Tarte Tatin

Quince Tarte Tatin
by David Lebovitz

The is one of the best Tartes Tatin I have ever had and Mr BT thought so too. It is not too sweet and really shows off the quince.

Shiva, Matza Balls, and the Morpurgo Family

Ghetto Entrance Bologna

A few months after my husband met his business partner, Silvano, who is originally from Venice, he told him about my family connection to Italy. Silvano’s eyes got big and he said, I think your wife and I might be related. After checking with his mother and an aunt, sure enough we are related by marriage.

Shift to six years later, and Silvano came and ate with Mr BT and me during the shiva of my mother-in-law. Silvano and I started talking about Italian Jewish holiday dishes and got to the subject of Pesach and matza balls. I told him that my family made unusual matza balls,  and I haven’t met a lot of people who are familiar with them. So, he asked how we made them. I explained we make them with whole matza and add nutmeg….. he looked at me and said very casually, “What is so special about those?! Those are the Morpugo matza balls and I haven’t met anyone else who makes them that way.” We both laughed and I paused for a minute. “Wait a minute.”, I said, “we are related on my paternal grandfather’s side of the family, but this recipe comes from my paternal grandmother’s side!”

He called me a few days later to say that he called one of his Morpugo aunts to tell her the story and she said, “Who needs a DNA test, the matching matza ball recipes confirm we are family!”

Fritelle di Mele – Apple Fritters

Apple Fritters

The holidays always make me think of the fun family gatherings we used to have. With most of the older generation no longer with us, it makes me think even more about the holiday foods I used to watch my paternal grandmother make. Before Hannukah, my grandmother was busy making her famous square chocolate cake, butter cookies, candied almonds, Butter-Mandel Kuchen, which she called Hefeteig (yeast dough) and Schnecken. But one of the treats that we all looked forward to were the fresh apple fritters she would make. The house would smell of sweet oil, apples, cinnamon and powdered sugar. I can smell them now as I am writing this post.

I decided to introduce my family’s tradition of apple fritters for Hannukah to Mr. BT and by the smile on his face, I think it will be a tradition we will continue.

Fritelle di Mele – Apple Fritters
Course: Dessert
Cuisine: Italian
Servings: 10 fritters
Ingredients
  • 3/4 cup plus 2 tablespoons unbleached all-purpose flour sifted
  • 1/4 cup sugar
  • 2 teaspoons ground cinnamon
  • 1/8 teaspoon ground cardamom
  • 1/8 teaspoon ground cloves
  • 1 teaspoon salt
  • 2 large eggs separated
  • 1 1/2 teaspoons unsalted butter melted
  • 1 teaspoon vanilla extract
  • 1/2 cup beer lager or pilsner
  • 1 large firm baking apple such as Granny Smith
  • 1/4 cup rum brandy or calvados
  • Peanut or safflower oil for frying
  • Icing sugar
Instructions
  1. In a bowl, whisk together the flour, sugar, cinnamon, cardamom, clove and salt.
  2. In a large bowl, whisk together the egg yolks, butter, and vanilla. Mix in a third of the flour mixture, then a third of the beer to combine. Add the rest of the flour mixture and beer in two additions; whisk well to combine. Set aside for 30 minutes.
  3. Peel, core, and slice the apple into ten 1/3 cm-(1/8 inch)-thick rings. Spread out the rings on a large plate or shallow pan, and pour the rum over the apple slices. Let the slices sit for 20 minutes to macerate in the rum.
  4. Whisk the egg whites to soft peaks, and fold them gently into the batter.
  5. Fill a high-sided skillet or wide pot with 5 centimeters (2 inches) of oil, and heat the oil to 190C (375F). In batches, dip the apple rings into the batter to coat both sides, and fry, turning once, until the apple fritters are golden and crisp, about 3 minutes. Drain on paper towels, sprinkle icing sugar on top, and serve warm.

Italian Vacation

Italian Reds

It is hard to believe that Mr BT and I were in Italy almost two months ago. We had planned a beautiful two week vacation, but sadly we had to leave five days into the trip due to my mother-in-law taking a turn for the worse.

Italian Savories

As I took the photos in Bologna of the beautiful food market and food shops, I was so looking forward to the numerous posts I planned for the blog. However, when I looked back at pictures this past week, I realized our hearts weren’t really in it. Mr BT and I were constantly worried: had we made the right decision to listen to the doctor and go ahead with the trip, wouldn’t your mother love walking through the streets with us, wouldn’t your Dad have loved this fish restaurant, wouldn’t my Dad love this museum…..

Cafe in Ferrara

When I called the owners of the farmhouse in Le Marche to tell them we had to cancel our stay, they said, “We are sorry, but don’t worry, we aren’t going anywhere, come stay with us next spring.” And that is exactly what we are going to do, go back and do it all over again.

Spelt Flour – In Biblical Portions

Stybl Spelt Flour

I have been baking exclusively with spelt flour for the last several months and it all began when I bought a kilo of organic spelt flour from the Stybel flour stand at Orbanics. I had heard that spelt is supposed to be better for you: that it is easier to digest, higher in protein, high in complex carbohydrates, contains all 8 essential amino acids needed by the human body, and is loaded with key essential minerals and vitamins. But, it has taken me a long time to actually buy some to bake with. I bake almost exclusively with whole wheat flour, so I am used to working with a whole grain flour. I actually like the nuttiness of some of the heartier whole wheat flours and would always buy bread and other baked goods from the Vollkorn (Wholemeal) bakery when I lived in Germany. The funny thing is after all these years I didn’t realize that bread I used to buy the most was a whole kernel spelt bread (Dinkelflockenbrot).

Italians call it “Farro” and it is found in gourmet soups, pizza crusts, breads and cakes; in Umbria it is even used instead of durum wheat to make pasta.

Spelt (Triticum spelta) is an ancient grain that is member of the same grain family as common bread wheat, rye, oats and barley, but is an entirely different species. It is one of the original seven grains mentioned in Ezekiel 4:9: “Take thou also unto thee wheat, and barley, and beans, and lentils, and millet, and spelt, and put them in one vessel, and make thee bread thereof …”. Sister Hildegard von Bingen (St. Hildegard), touted as one of the earliest health food nuts, said “the spelt is the best of grains. It is rich and nourishing and milder than other grain. It produces a strong body and healthy blood to those who eat it and it makes the spirit of man light and cheerful. If someone is ill, boil some spelt, mix it with egg and this will heal him like a fine ointment.”

Spelt Grain

Spelt was a popular grain up until the 19th century, when the common bread wheat was discovered to be easier to mill and give a much higher yield than spelt which was harder to process because it contains a very thick husk unlike its cousin. Spelt started showing up in health food stores in the 1980s, but has only recently shown a tremendous comeback since whole foods are shown to be much better for us.

Spelt is not wheat-free like some people are saying, and is definitely not gluten free. Celiac sufferers cannot consume products made from spelt, but some people with wheat allergies or wheat intolerance can eat small quantities of spelt. If, however, you have an allergy or intolerance to wheat, consult a doctor before you try eating products made with spelt.

Spelt is not difficult to bake with, but there are a few important pointers to ensure a successful baked-good:

  • Unlike all-purpose flour, where you can get away with not always sifting the flour, it is important to sift spelt flour before using it. Otherwise, you may end up with a lumpy dough or cake batter.
  • Compared to wheat flour, spelt flour needs less liquid to make the same consistency dough. Use three-quarters the amount of liquid relative to that you would use with wheat flour. For example, if a particular recipe requires 1 cup of liquid when mixed with wheat flour, it would need ¾ of a cup when using spelt flour.
  • Do not overmix the batter or overknead the dough. The gluten in spelt is not as durable as in other wheat and may result in a crumbly or tough texture.
  • It is recommended to keep spelt flour in your refrigerator or freezer to maintain its freshness.

Don’t be afraid to bake with spelt, it makes a really light loaf of bread with an appealing nutty flavour. The high protein in the spelt results in a very light, soft-textured bread that isn’t crumbly when sliced. It also makes a light, soft-textured cake.

Spelt Cherry Pie

Cherry Pie with Spelt Flour and Cream Cheese Pie Crust
Pie crust adapted from a recipe from the The Pie and Pastry Bible by Rose Levy Beranbaum
Ingredients
Pastry for a two-crust 9-inch pie:
  • 170 g 12 tablespoons unsalted butter, cold
  • 2 cups spelt flour
  • 1/4 teaspoon salt
  • 1/4 teaspoon baking powder
  • 127 g 4.5 ounces cream cheese, cold and cut into 3 or 4 pieces
  • 2 tablespoons ice water
  • 1 tablespoon cider vinegar
  • Egg wash
  • 1 tablespoon caster sugar
Cherry filling:
  • 1/4 cup Demerara sugar
  • 3 tablespoons cornstarch
  • 2 teaspoons ground cardamom
  • 1 kg 2-1/4 pounds fresh sour cherries, pitted, or 3 packages of 380 grams (2 pounds) frozen sour cherries, partially thawed and drained
Instructions
For the cherry filling:
  1. In a large bowl, mix the cherries with the sugar, cornstarch and cardamom. Add more sugar if the cherries are too tart.
  2. Spelt Cherry Pie
For the pastry:
  1. Cut the butter into small (about 3/4-inch) cubes. Wrap it in plastic wrap and freeze it until frozen solid. Place the flour, salt, and baking powder in freezer bag and freeze for at least 30 minutes.
  2. Place the flour mixture in a food processor with the metal blade and process for a few seconds to combine. Add the cream cheese and process until the mixture resembles coarse meal. Add the butter and pulse until it is in even small pieces, each a little larger than a pea. Add the water and the vinegar and pulse until the pieces of butter are the size of tiny peas. The mixture will be separate tiny pieces. Do not pulse into a mass.
  3. Divide the mixture into two ziploc bags and knead the mixture just until the dough comes together. Flatten into discs and refrigerate for at least 45 minutes or overnight.
  4. Grease a 22-inch (9-inch) pie pan. Roll out the bottom crust and place in the pan. Add the cherry filling and cover with the top crust. Cut slits in the top crust or cut out a decorative design to let the steam out of the pie while it is baking. Crimp the edges decoratively. Brush the crust with an egg wash and sprinkle the top with caster sugar.
  5. Place the pie on baking sheet and bake at 200C (400F) for 20 minutes. Cover the edges with a foil collar to prevent over-browning. Continue to bake until the filling bubbles and the crust is golden brown, about 25-30 minutes longer. Transfer the pie to rack and cool for at least 1 hour. Serve warm or at room temperature.